Ever walked past a house and thought, “wow, their garden looks so neat and organised”? We bet they had some form of garden edging. And here’s a secret – you don’t need to break the bank to get that same polished look.
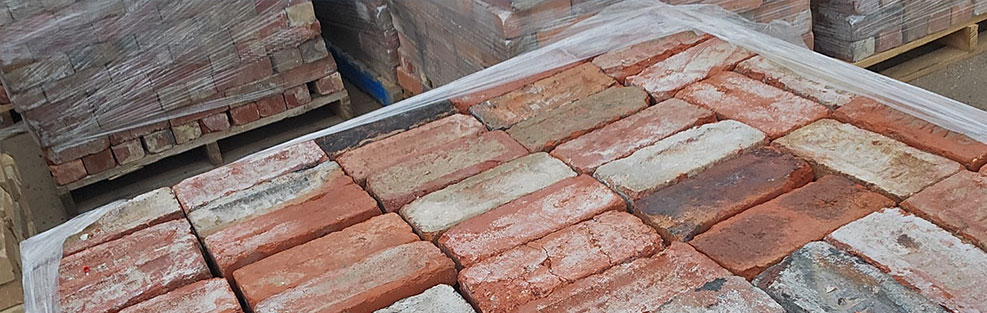
We’ve been working with bricks for years, and we can tell you that second-hand bricks make some of the most beautiful garden edges you’ll ever see. They’ve got character, they’re tough as nails, and they won’t cost you a fortune.
We will demonstrate to you how to make beautiful garden borders with old bricks. Believe us, it is not as hard as you think.
Why We Always Recommend Second-Hand Bricks for Gardens
When people ask us about garden edging materials, we always point them toward reclaimed bricks first. Here’s why they’re our go-to choice:
These bricks have already justified themselves. They have withstood decades of weather, and they are still there. Many new materials will not have that type of durability.
The character is unmatched. Each brick tells a story – maybe it came from an old Victorian home, or perhaps a century-old warehouse. Some have paint spots, others show gentle weathering. This gives your garden a unique personality that you simply can’t buy new.
Your wallet will thank you, too. While fancy new edging materials can cost $20-30 per meter, good quality second-hand bricks often cost half that amount.
Plus, you’re doing something good for the environment. Instead of these bricks ending up in a landfill, you’re giving them a second life in your garden.
What You’ll Actually Need (No Fancy Tools Required)
We’ve seen people overcomplicate this project with expensive tools they’ll never use again. Here’s what you really need:
The Essentials:
- Second-hand bricks (I’ll help you calculate how many shortly)
- Sand for the base
- A decent shovel
- String line or garden hose for marking
- Rubber mallet (or regular hammer with a piece of wood)
Nice to Have:
- Wheelbarrow for moving bricks
- Spirit level for perfectionist types
- Knee pads (your knees will thank you)
Planning Your Project – The Smart Way
Before you touch a single brick, spend 20 minutes planning. Walk around your garden area and really look at it.
Where do you want the edging to go? Mark it out with spray paint or even flour – both wash away easily if you change your mind.
Think about maintenance access, too. Will you be able to reach plants behind the edging? Can your mower get close enough to cut the grass?
For calculating bricks, here’s our simple rule: measure your edging length in meters, then multiply by 4. So a 10-meter edge needs about 40 bricks. Always buy 10% extra – trust us on this one.
The Step-by-Step Process (From Someone Who’s Done This Hundreds of Times)
Getting Your Foundation Right
This is where most people mess up. They skip the proper base and wonder why their edging looks wonky six months later.
Dig a trench about 10cm deep and slightly wider than your brick. Don’t go crazy deep – you want most of the brick showing above ground.
Here’s a pro tip we learned the hard way: keep that soil you’re digging up. Put it in a wheelbarrow or on a tarp. You’ll need it later for backfilling.
Creating the Perfect Base
Pour about 5cm of sand into your trench. This isn’t just for looks – it’s what keeps everything level and stable.
We like to spray the sand lightly with water as we go. Not soaking wet, just damp enough to pack down slightly when you press it.
Laying Your Bricks Like a Pro
Start at one end and work your way along. Place each brick firmly into the sand base, giving it a gentle tap with your mallet.
The top of each brick should sit about 2-3cm above ground level. This stops grass from creeping over and gives you that clean, defined edge.
Don’t stress about getting every single brick perfectly level with your neighbors. Slight variations actually look more natural and charming.
The Finishing Touches
Once all your bricks are in place, backfill around them with that soil you saved earlier. Pack it down firmly – you don’t want gaps where water can pool.
Give the whole area a gentle watering. This settles everything into place and shows you if any bricks need adjusting.
Different Styles That Work Really Well
The Classic Single Row – Perfect for beginners, and looks clean and timeless.
Soldier Course – Bricks standing upright. Great for taller borders around raised beds.
Basket Weave Pattern – Alternating horizontal and vertical bricks. Takes more time, but looks fantastic.
Curved Edges – Don’t be afraid of gentle curves. They often look more natural than straight lines.
Where to Find Quality Second-Hand Bricks
We get asked this question constantly. Here are our best sources:
Local demolition sites often have piles of bricks they’re happy to sell cheap. Just ask the site supervisor first – don’t just help yourself!
Online marketplaces like Facebook Marketplace and Gumtree always have people selling bricks from home renovations.
For second-hand bricks for sale in melbourne, check out dedicated brick yards. They often clean and sort bricks, so they’re ready to use straight away.
If you need specialised bricks like recycled air bricks in Melbourne for drainage areas, brick suppliers usually have a better selection than random online sellers.
Common Mistakes We See All the Time
Skipping the sand base is the biggest one. Yes, it’s an extra step, but your edging will last decades instead of seasons.
Making the trench too deep is another classic mistake. Remember, you want the bricks visible above ground.
Rushing the job never works. Take your time with the foundation work. Everything else gets easier when the base is right.
What This Project Will Actually Cost You
Let me break down real numbers:
| Item | Cost Range | Notes |
| Second-hand bricks(per piece) | $0.40 – $0.80 | Cleaned bricks cost more |
| Sand(per bag) | $15 – $20 | One bag covers about 8-10 meters |
| Basic tools(if needed) | $30 – $50 | Reusable for other projects |
For a typical 15-meter garden edge, you’re looking at $80-120 total. Compare that to $200-300 for new materials!
Final Thoughts from Someone Who’s Seen It All
After working with bricks for years, we can honestly say that garden edging projects give some of the biggest visual impact for the least effort.
At Bricks Victoria, we know garden edging projects deliver a big visual impact with minimal effort. Using reclaimed bricks adds rustic charm and warmth to any garden style. Pick a sunny weekend, gather your materials, and start transforming your garden—you’ll love the results for years to come!